
The View menu can display and hide elements from the user interface (for example,
the Toolbars and the Status Bar).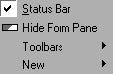
Status Bar
When enabled, displays the Status Bar; when disabled, hides the Status Bar. The
Status Bar is placed at the bottom part of the user interface. It gives you different
prompts and tells you where to find help.
Hide Form Pane
When enabled, hides the Input View window. When disabled, displays the Input View
window. To display or hide the Input View window, from the View menu, click the Hide
Form Pane button.
Toolbars
Allows you to display and hide the following toolbars: Graphic, Parameters, Window,
Main. When an option is enabled, the appropriate toolbar is displayed; when an option
is disabled, the toolbar is hidden.
New
Allows you to display and hide eight views which can all be displayed in the Multiple
View window.
Using the commands in the New submenu
The OptiGrating 4.2 Multiple View window consists of several different views.
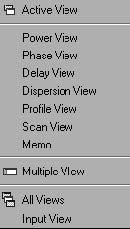
Five of the View windows – Power, Phase, Delay, Dispersion, Scan and Profile – offer
graphic views and give you different graphic results. The Input View allows you to
enter calculation options while the Memo View enables you to write some comments
about the graph or project you are working with.
If you “clone” all views listed in the New submenu shown above (View > New), they
will become separate windows instead of being docked in a multiple window. You will
then be able to size and position them in a workspace.
You can also clone the Multiple View window, and you can have more than one of
each window. To clone all views, i.e. to undock them from the Multiple View window,
click the All Views button.
Note: You can also clone an active view, a view you are currently using, by
clicking the Open Active View but on on the toolbar. When you are cloning a view,
the cloned window is not separated from the document. Since all cloned windows
share the same document, if you change your calculation options, all cloned
windows will be redrawn according to your changes.
To use the Input View window as a separate window
| 1 | File > New. |
| 2 | In the New dialog box, choose one of the five modules and enter the desired values in the dialog box. |
| 3 | From the View menu, click New, Input View. |
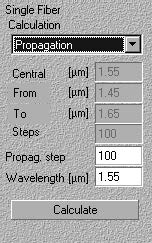
| 4 | In the Input View window, enter the desired calculation values. |
You will notice that the window’s options change according to the type of calculation
performed: Propagation, Spectrum, and Pulse Response.
Note: You can also open the Input View window in a separate window by clicking
anywhere in this window and pressing the Open Active View button on the
Toolbar.