To define the materials and the channel, perform the following procedure.
| Step | Action |
| 1 | From the File menu, select New.The Initial Properties dialog box appears. |
| 2 | Click Profiles And Materials.
The Profile Designer opens and displays the Options dialog box. – Change the Master library path if required, and then click OK to close the Options dialog box. |
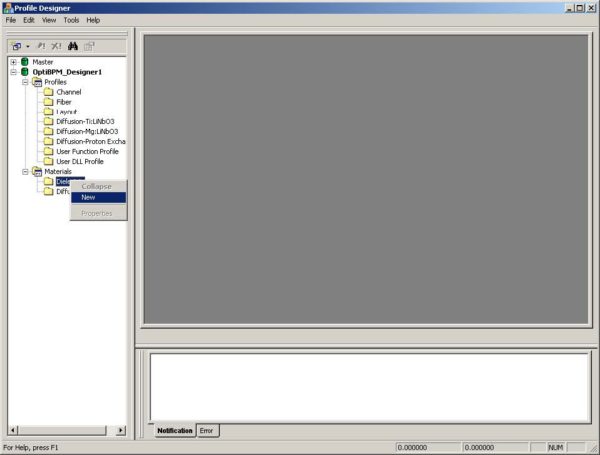
| 3 | Under OptiBPM Designer 1, in the Materials folder, right-click the Dielectric folder.
A context menu appears. |
| 4 | Select New (see Figure 1).
The Dielectric1 dialog box appears. |
Figure 1: Create a new dielectric material
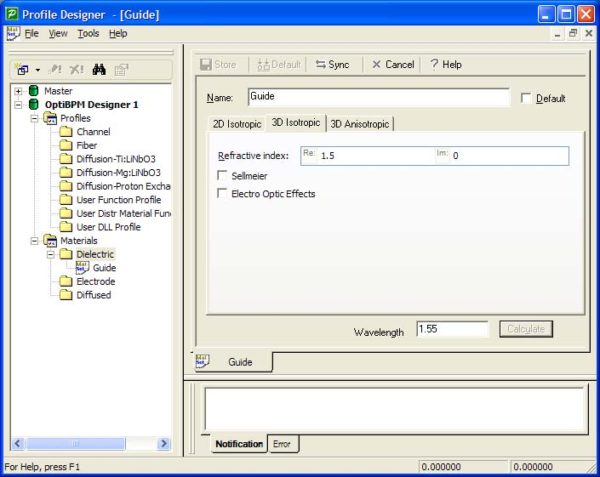
| 5 | Type the following information (see Figure 2):
Name: Guide 3D Isotropic Refractive Index (Re:): 1.5 |
Figure 2: New dielectric material
| 6 | Click the 2D Isotropic tab, and unselect the Use Default check box. (The
script will change the 2D Index value, so it should not be linked to the 3D value by a default definition. Click Store. |
| 7 | Repeat steps 3 to 6 to create a second material. Type the following information:
Name: Clad 2D Isotropic Refractive Index (Re:) 1.45 |
| 8 | Under OptiBPM Designer 1, in the Profiles folder, right-click the Channel folder.
A context menu appears. |
| 9 | Select New.
The ChannelPro1 dialog box appears. |
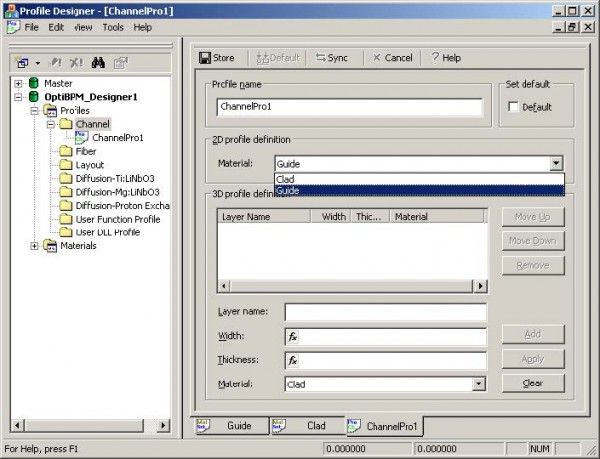
| 10 | Under 2D profile definition, from the Material drop-down list, select Guide (see Figure 3). |
Figure 3: 2D profile definition material—Guide
| 11 | To save the setting, click Store. |
| 12 | Close the Profile Designer to return to OptiBPM_Designer. |


