To define materials, perform the following procedure.
| Step | Action |
| 1 | From the File menu, select New.
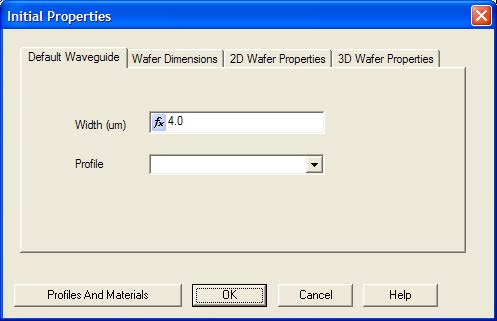
The Initial Properties dialog box appears (see Figure 3). |
Figure 3: Initial Properties dialog box
Use the Initial Properties dialog box to specify basic parameters. These parameters can be changed later in the session, but they are set at the beginning of the creation of a project because they are expected to change less frequently. For example, it is expected that a property such as the Refractive Index will change less frequently in a design session than some other property that is to be engineered, such as layout geometry. The Waveguide Profile is the specification of the waveguide geometry in the transverse plane. Channel waveguides consist of layers, fibers have circular cross section, and diffused waveguides have graded index. These definitions also change less often in a design session than does layout geometry.
| 2 | Click Profiles And Materials.
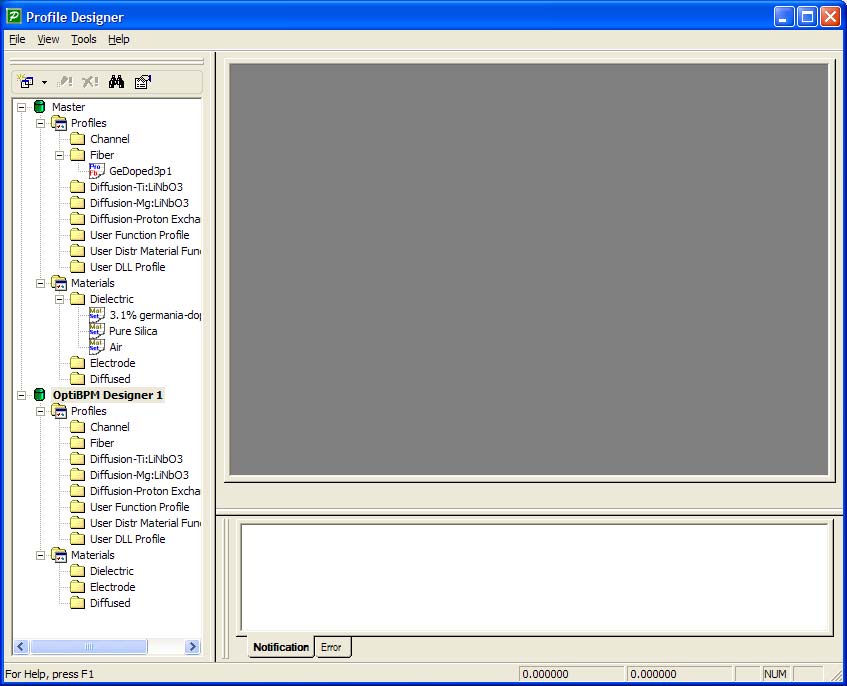
The Profile Designer window appears (see Figure 4). Note: To ensure that you can view all information, maximize the Profile Designer window. |
Note: If you see the warning message “Folder does not have write access rights.
Profile Designer is unable to continue unless you specify a new storage path”, then see “Selecting the Master library path” on page 203 of the Tutorials and Technical Background manual to reset the Master.plb path.
Figure 4: Profile Designer window
There are two main branches in the tree at the left of the Profile Designer window, Master and OptiBPM Designer1. OptiBPM Designer1 is the temporary name of the project we are currently working with. When you save the project, you can give it a more meaningful name.
The main branches have identical subbranches. The subbranches organize user defined materials and waveguide profiles. You define new materials and profiles in the Project branch. If you expect to use the definitions again, drag and drop them into the Master branch. When you open OptiBPM again, the Material and Profile definitions will appear in the Master branch. You can drag them to the new project branch rather than having to create them again.
Note: As this is our first time using OptiBPM, we won’t be using the Master directory. Click on the ![]() icon to close it now, so you don’t use it by mistake later in this lesson.
icon to close it now, so you don’t use it by mistake later in this lesson.
| 3 | In the directory under OptiBPM_Designer1, under the Materials folder, right-click the Dielectric folder.
A context menu appears. |
| 4 | Select New.
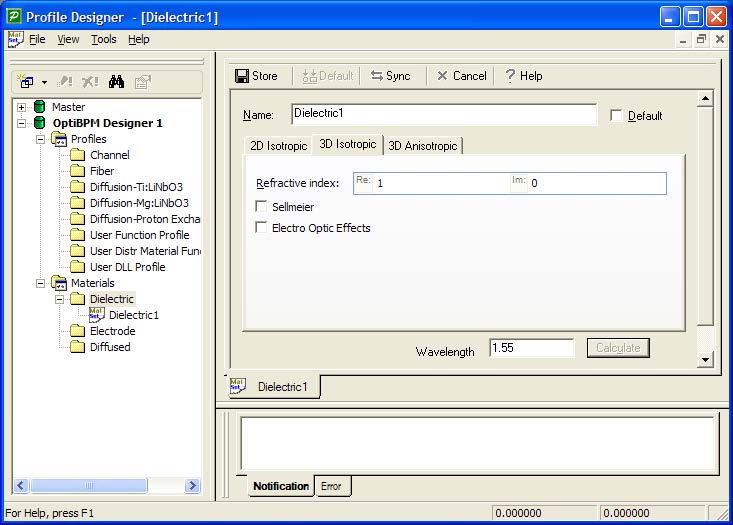
The Dielectric1 dialog box appears (see Figure 5). |
Figure 5: Dielectric1 dialog box
| 5 | Type the following information:
Name: Silica Core Refractive index (Re:): 1.5 |
| 6 | Click the 3D Isotropic tab and type Refractive index (Re:): 1.5 |
| 7 | To save the material, click Store.
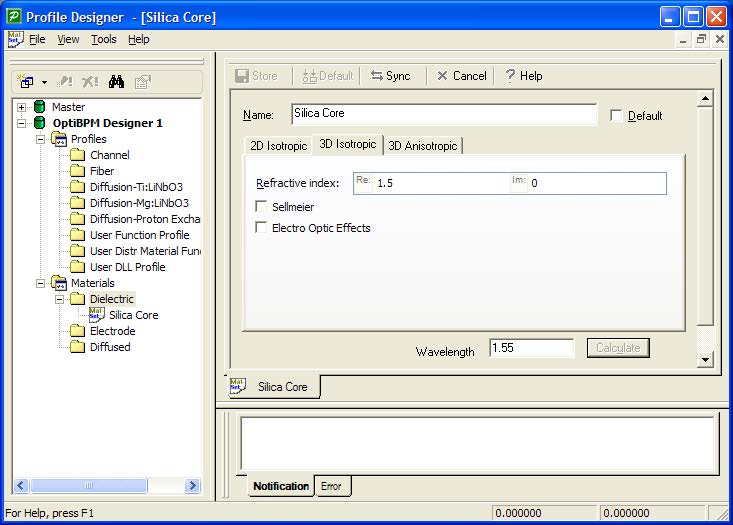
Silica Core appears in the Dielectric folder in the directory and in the dialog box title bar. Note: You can leave the dialog box open, or close the dialog box to prevent the Profile Designer window from becoming cluttered. There are two definitions of refractive index, because in 2D calculations, often the refractive index is not a physical index but is an effective index. The 2D tab is a place to hold an effective index; by placing the effective index in the 2D tab, the index will only be used when 2D simulations are performed. The 3D BPM and mode solvers will use the definition in the 3D tab (see Figure 6). |
Figure 6: Created dielectric material
| 8 | Click the 3D Anisotropic tab.
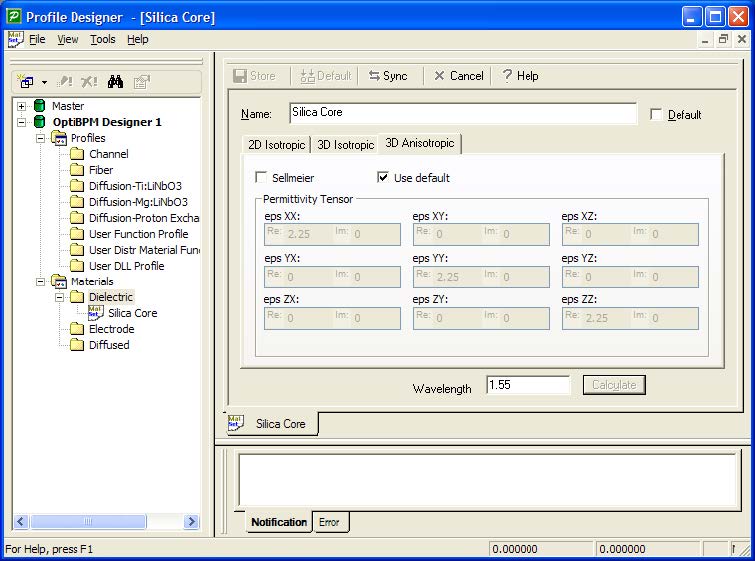
At some point in a project, another BPM simulator that can accept anisotropic media might be used. Anisotropic media are characterized by the permittivity tensor (see Figure 7 ). The Silica Core material may be used in this environment (even though it is not itself anisotropic), and so by default, OptiBPM automatically sets up the appropriate diagonal permittivity matrix, with n2 in the main diagonal. If you need to specify an anisotropic material, unselect the default check box and input the appropriate constants (see Figure 7). |
Figure 7: 3D Anisotropic tab
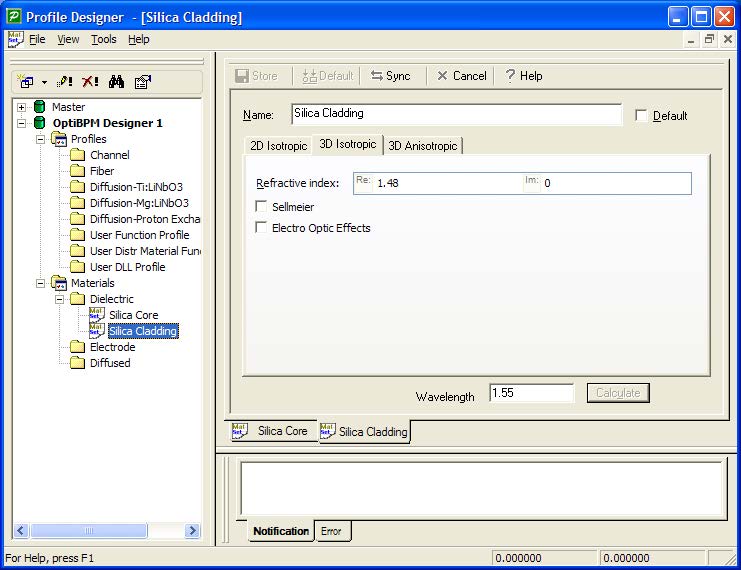
| 9 | Repeat steps 3 to 6, and type the following information (see Figure 8)
Name: Silica Cladding Refractive index (Re:): 1.48 |
| 10 | To save the information, click Store.
Silica Cladding appears in the Dielectric folder in the directory and in the dialog box title bar. |
Figure 8: Cladding definition


